Terms And Conditions for Jira
SERVER DATA CENTER
Terms and Conditions for Jira request Atlassian Jira users to accept an organisation's specific Terms and Conditions, Acceptable Use Policy or other similar content.
When this plugin is active, users must accept the specified Terms and Conditions if they wish to access your Confluence pages.
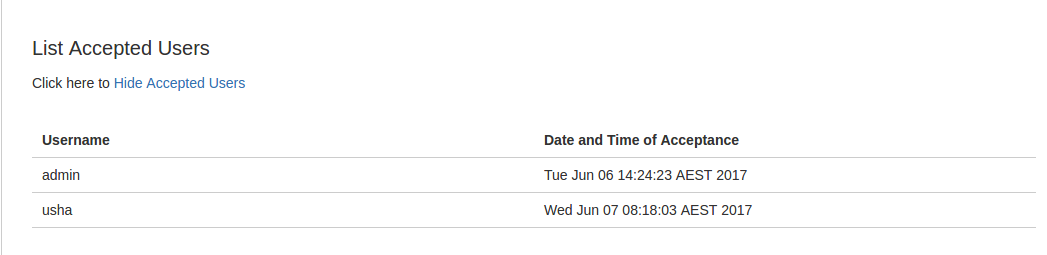
Each user is only required to accept the Terms and Conditions once. i.e. when a user accepts the T&Cs, they won't be prompted by the acceptance message again. Administrators can view a list of users who have accepted, including date and time.
Administrators can reset access and request all users to re-accept. For example, if an organisation's Terms and Conditions are changed/updated, all users can be requested to agree to new T&Cs.
Where is Terms and Conditons for Jira Cloud?
As much as we would love to create a Cloud version of Terms and Conditions for Cloud, the Atlassian Connect and Forge frameworks which are used for app developer do not provide us the capabilities to do so.
Help us get this resolve by voting ![]() on the following tickets:
on the following tickets:
Table of Contents
Installing Terms and Conditions for Jira
Log in to the Atlassian Jira instance as an admin or a system administrator.
Choose Cog > Manage Apps from the menu. The Administration page will display.
Click the Find new apps link.
Enter the search text "Terms and Conditions" in the search field. The appropriate add-on version appears in the search results.
To install the add-on, click the Buy now or Free trial button.
A confirmation message and details appear when the add-on is installed successfully. Follow the prompts to apply the appropriate license.
Using Terms and Conditions for Jira
Configuration
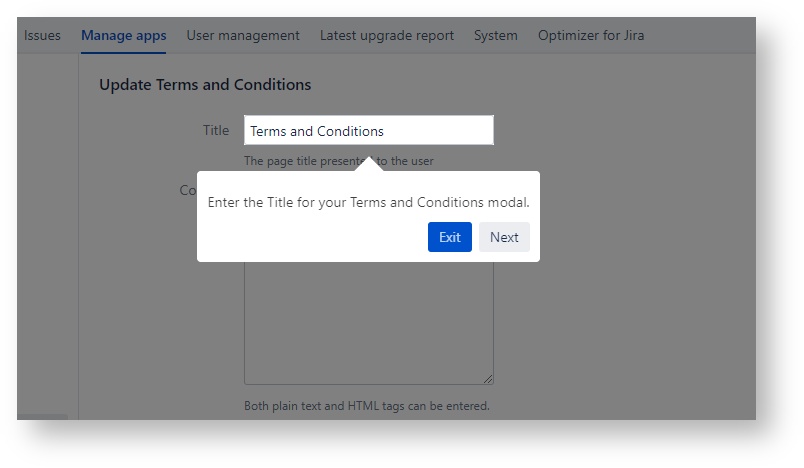
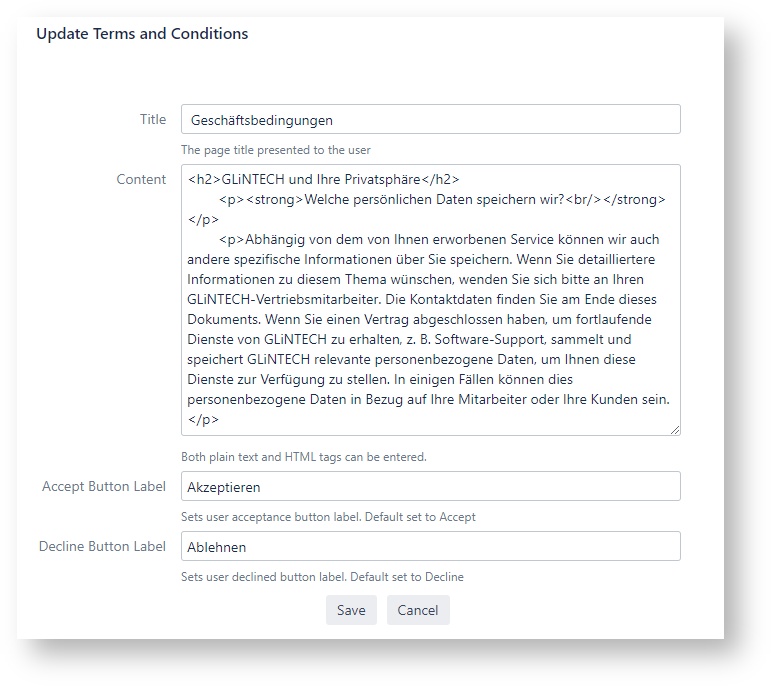
Once installed, Terms and Conditions can be configured by navigating to the Terms and Conditions configuration page.
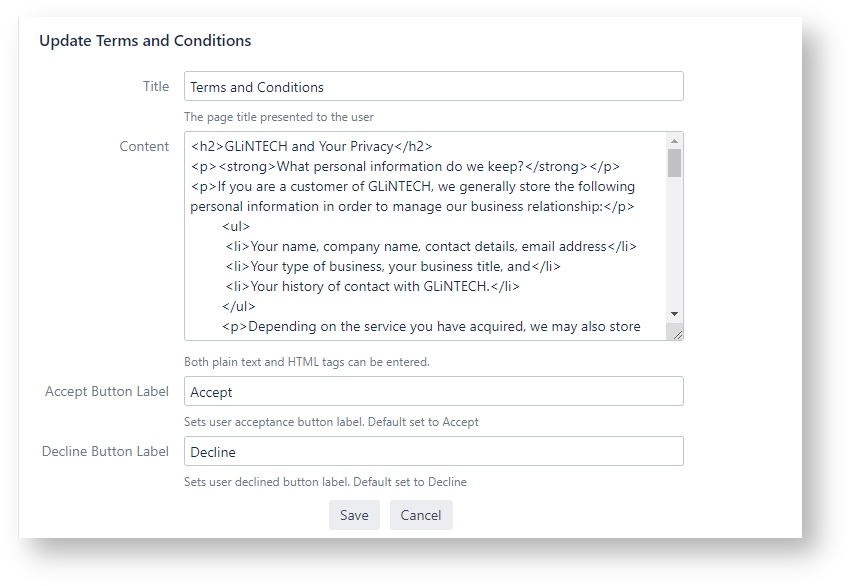
The Terms and Conditions configuration page presents the user with four fields. When you set this up initially, a handy Wizard will prompt you through each of the steps.
Title - This is the title of the page presented to the user.
Content - The content of the use policy or terms and conditions. This can be entered and plain text or as HTML
Accept Button Label - The word that appears on the acceptance button
Decline Button Label - The word that appears on the decline button
User View
At first login, once the Terms and Conditions have been configured, the user is presented with the following view. The modal pop up is scrollable and will disappear on acceptance. If the user declines the Terms and Conditions, they will be redirected to the login page.

Requesting the user to re-accept
If policies change or the terms and conditions have been updated, the System administrator can request confluence users re-accept the changes by resetting their initial acceptance.
The System Administrator can reset individual users or all users.

Additionally, a System Administrator can see exactly who has accepted the user-policy or terms and conditions by listing all accepted users.
Difference languages
During configuration, the system administrator can enter text in the title, content and label field, in their preferred language.

Extract Data
If you would like to extract the acceptance statuses and audit for TCs you will need to run queries against your database.
(AO_XXX may be unique to your environment)
User Acceptance Data:
SELECT * FROM "public"."AO_FEB641_TCS_STATUS"
Groups Acceptance Data:
SELECT * FROM "public"."AO_FEB641_TCS_GROUP_STATUS"
Audit Data:
SELECT * FROM "public"."AO_FEB641_TCS_AUDIT"
or any tables with "AO_FEB641"