Out of Office for Jira
CLOUD

Out of the box, Jira has no way of checking if a user marked as an approver or assignee is out of office. This means tickets can sit in the queue, in a state of Waiting for Approval until they return. This can blow out SLAs and keep customers waiting. Out of Office for Jira uses Jira Assets and Automation rules to assign alternative approvers and assignees when a user is out of office.
Out of office for Jira is designed to work in an environment with Assets and Jira Service Management.
Installing the app
Navigate to the Apps menu on the site you wish to install Out of Office for Jira and navigate to Find new apps. Search for Out of Office for Jira, select and install.
Configuring the app for the first time
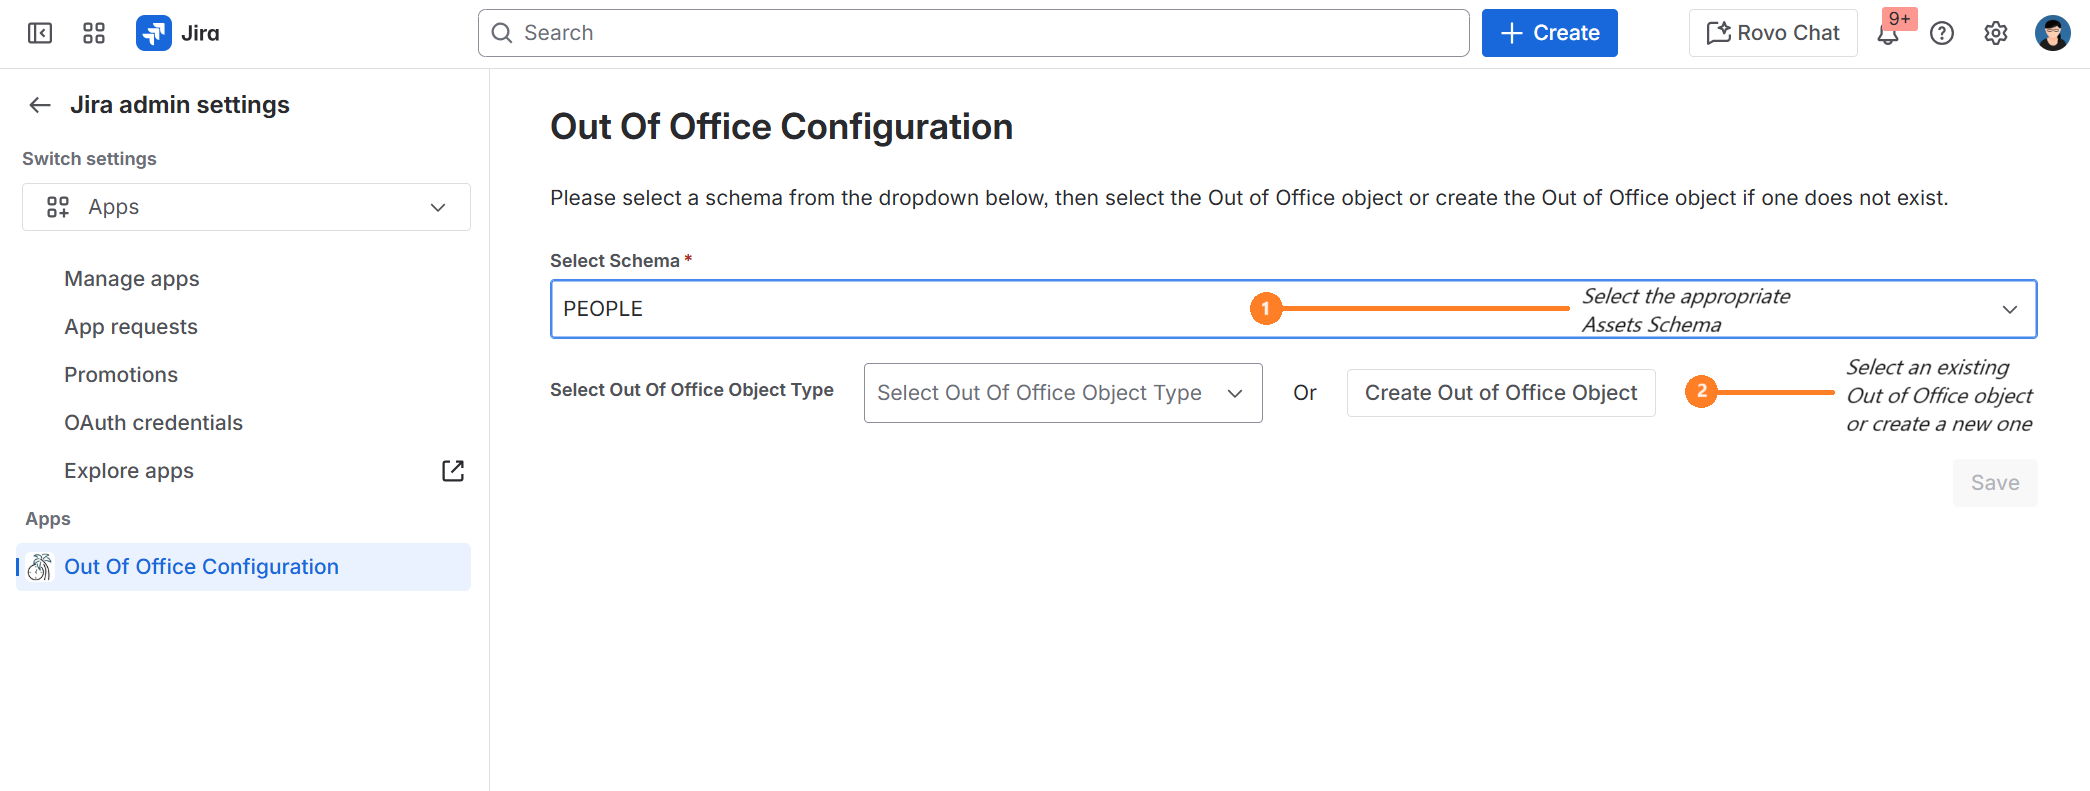
The Out of Office app will identify the assets workspace associated with your Jira instance. Once identified, a drop-down menu of all available Asset schemas will be presented to the user.
Select an appropriate Assets Schema
Select “Create Out of Office Object”. This button will create an object with the appropriate attributes in the Schema you have selected and Save automatically.
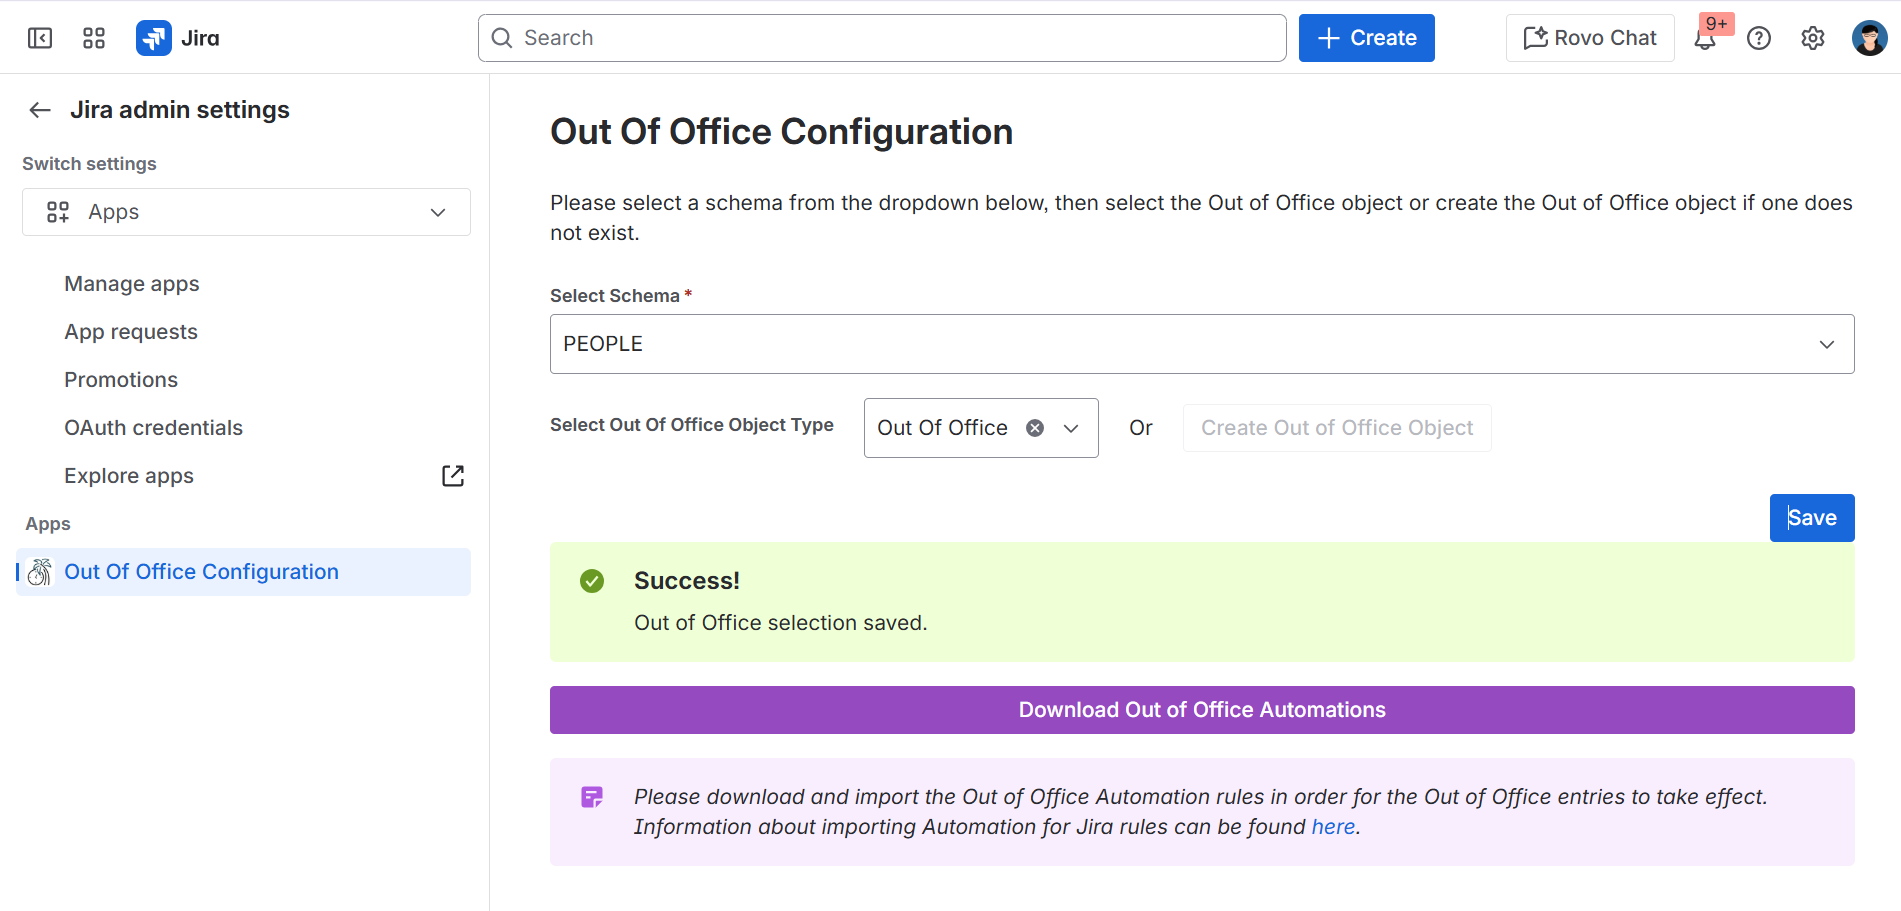
Upon successful creation, select “Download Out of Office Automations”. This will download a JSON file containing three automation rules to be imported. These rules contain the business logic that ensures the Out of Office object entries work correctly. Import the rules.
Information about importing Automation for Jira rules can be found here.
Configuring the app when the Out of Office object already exists.
If you have previously created Out of Office objects but need to save the configuration again, please follow the steps below.
Select an appropriate Assets Schema
From the drop-down, select the “Out of Office” object.
Select “Save”
Upon saving, select “Download Out of Office Automation”. This will download a JSON file containing three automation rules to be imported. These rules contain the business logic that ensures the Out of Office object entries work correctly. Import the rules.
Information about importing Automation for Jira rules can be found here.
New Functionality V4.0.0
We have recently added two new attributes to the Out of Office object:
Alternate Assignee Group
Alternate Approver Group
This allows you to assign a group for the Alternate Assignee and Approvers instead of an individual.
When you upgrade to the latest version of Out of Office Jira, please check your configuration to ensure the Out of Office object complies with this latest version.
The Assignee and Approver attributes should look like this:
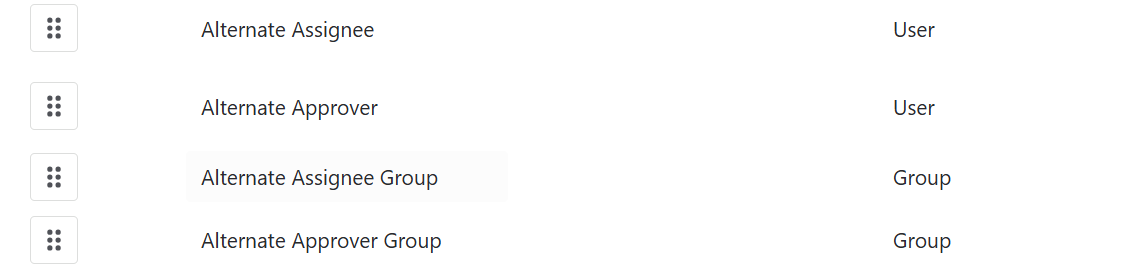
The app will also tell you if something isn’t right.
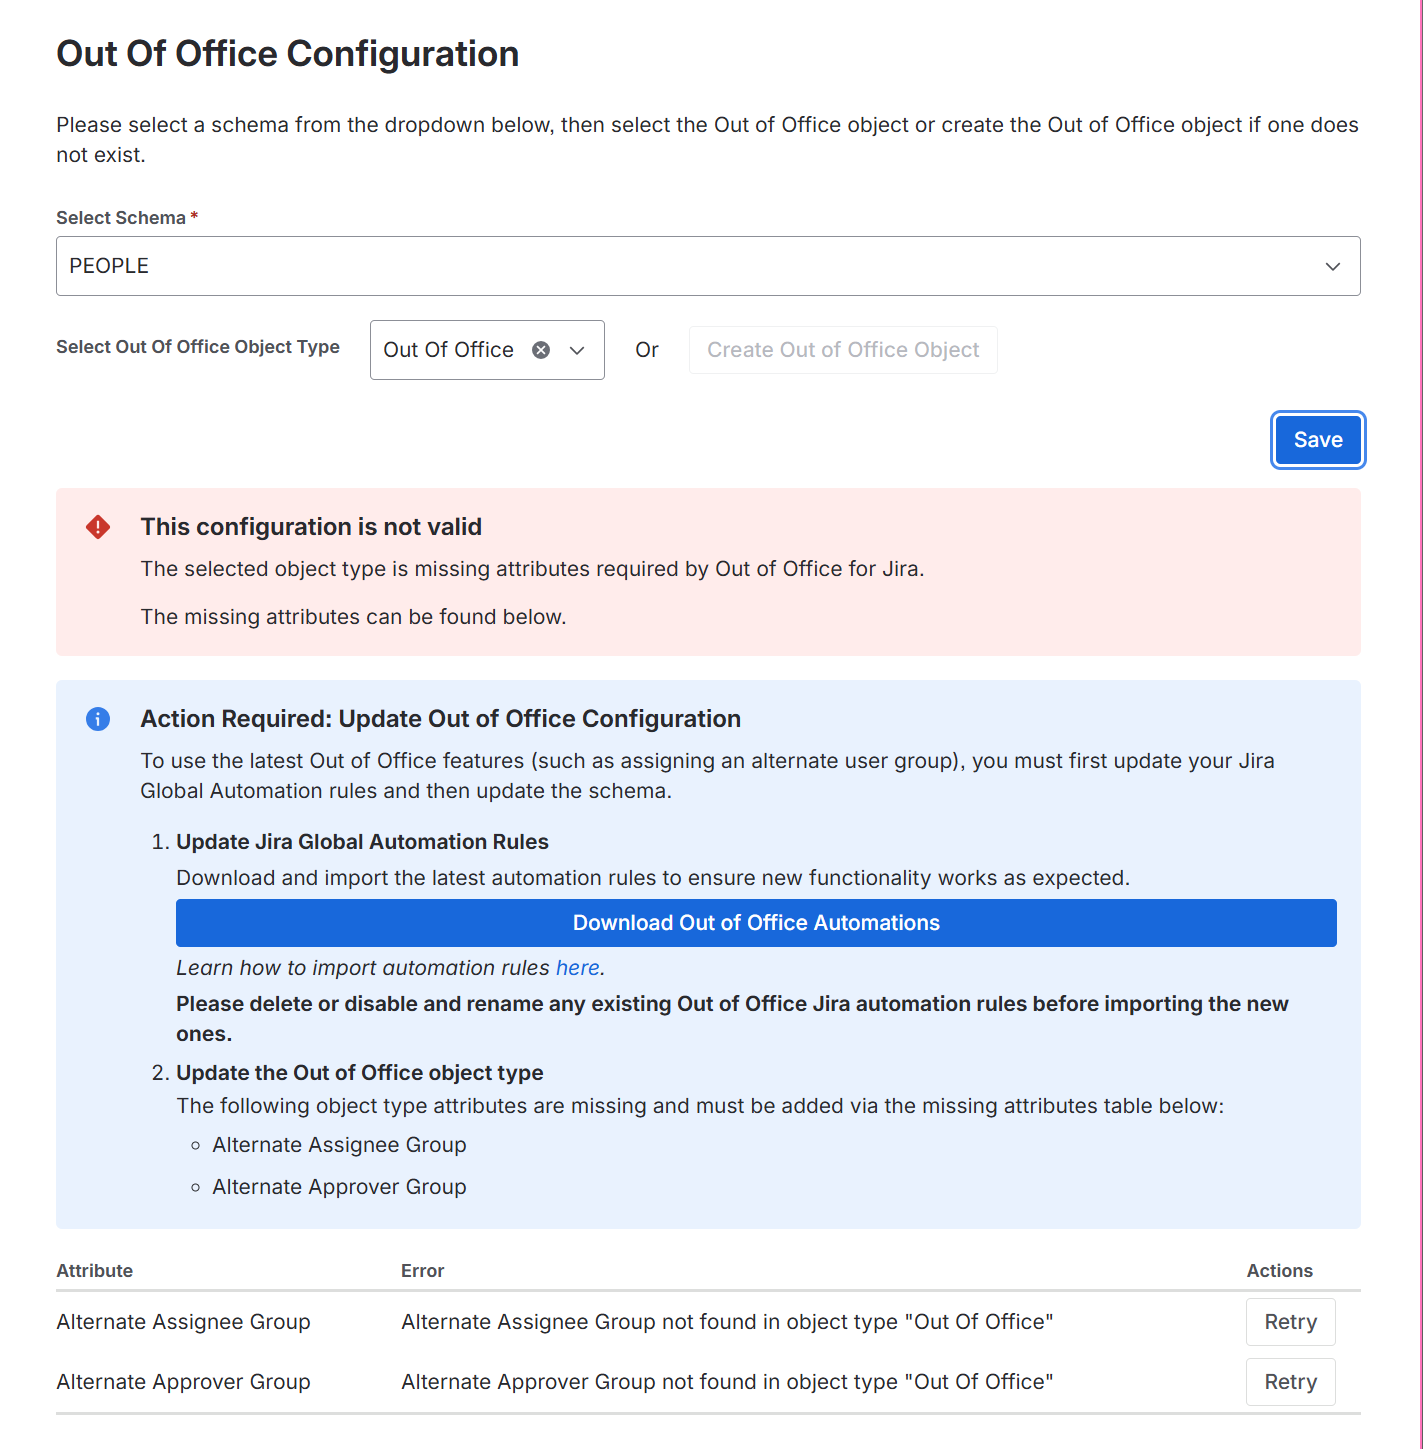
ℹ️ The automation rules now include two new attributes. Please follow the instructions to remove and re-import the latest automation rules.
A detailed explanation can be found on this page: https://docs.glintech.com/out-of-office-for-jira/upgrading-to-out-of-office-for-jira-v4.0.0/
Creating an out-of-office entry
Navigate to your Jira Service Management project
Select Queues
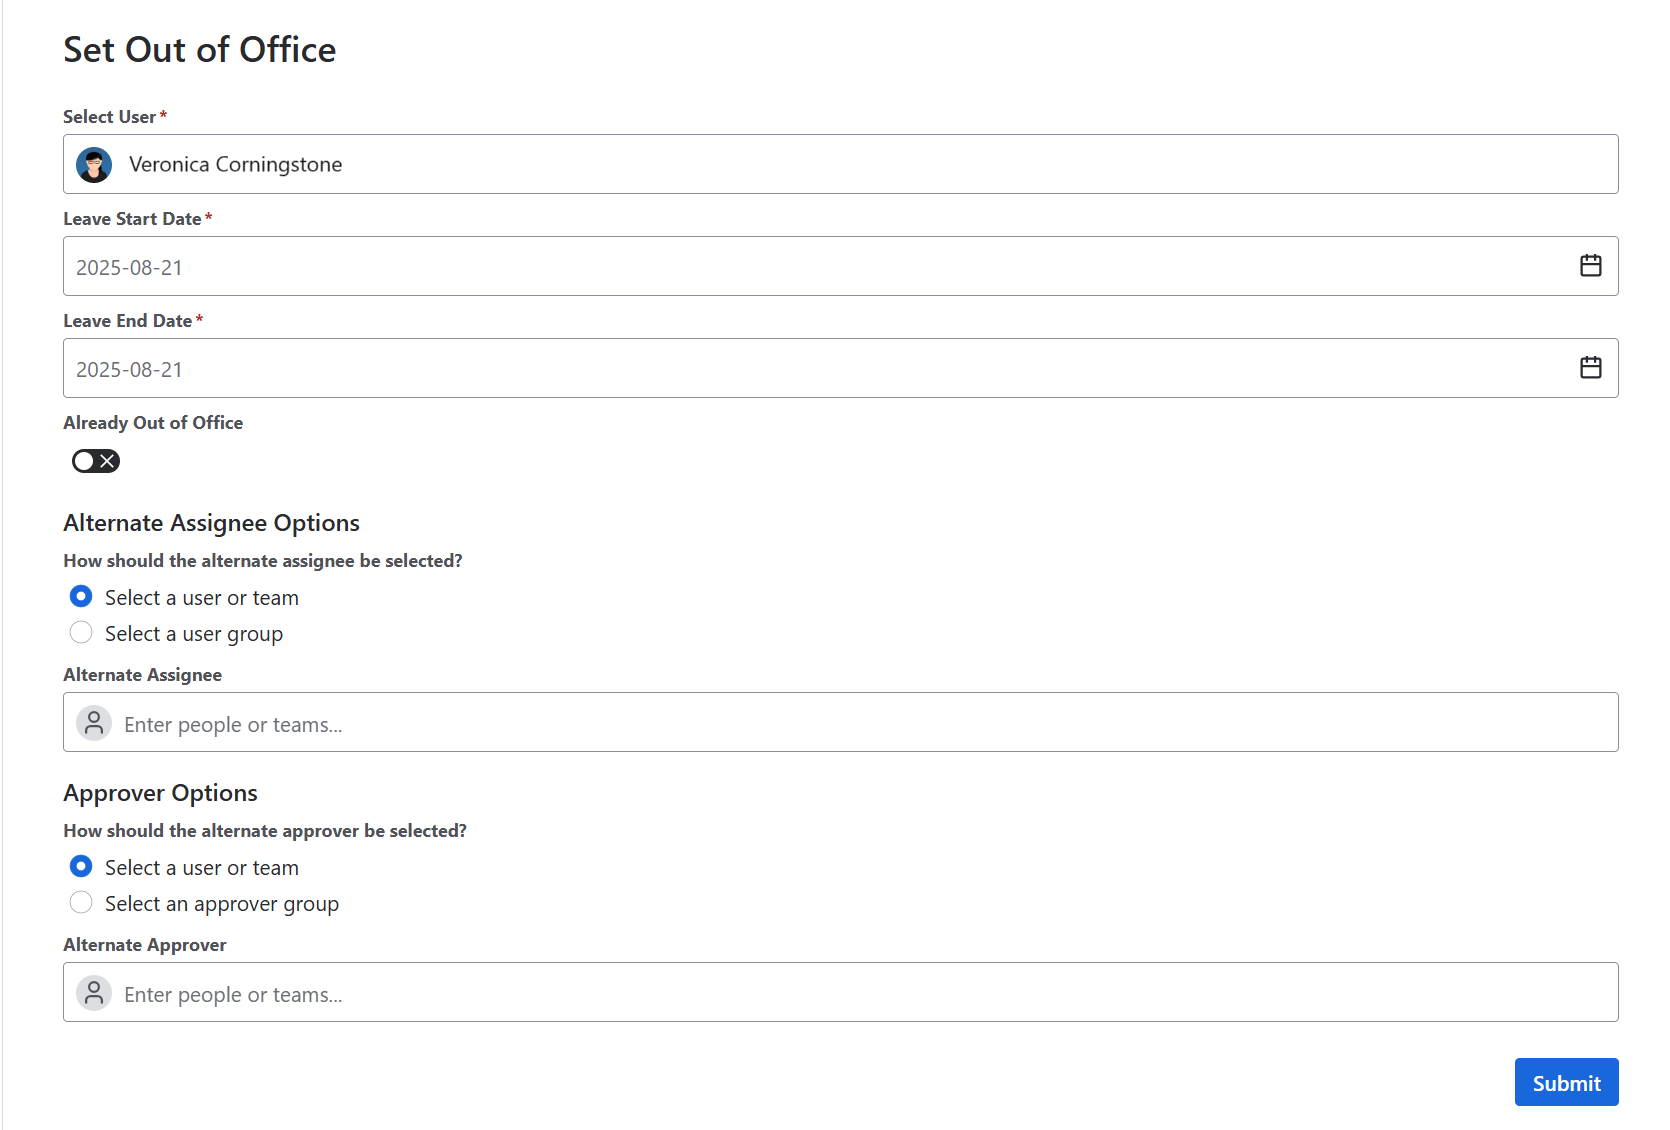
Under App, select ‘Set Out of Office'
By default, the User will be the logged-in user. Select dates and alternate users.
Save.
ℹ️ If an entry already exists that overlaps with the dates selected, you will not be able to save the out-of-office settings. If you need to modify the entry, contact your systems administrator.